The term hand rubbed isn’t what it’s perceived today. Let’s face it we are a lazy bunch when it comes to physical work and impatient as well, these two ingredients rob us from achieving wondrous, fantastic results. You know the old saying “Rome wasn’t built in a day.” and neither should your projects be, let’s leave the shoddy work for the mass producers. We as amatuer woodworkers aka hobbyists have the luxury of time so why not utilise that time into producing outstanding results, after all we have the most important critic to satisfy…Ourselves.
The greatest advantage of oil polishing as it was once called is its permanence, it will withstand both heat and moisture and gives a dull, glossy or as it’s also known as a lustrous sheen effect and in some timbers it really can pop the grain which makes it visually very appealing. Oiling your timbers can really be a lifesaver as you don’t’ have to worry about brush marks, runs or drips, fish eyes, orange peels and so forth. It really is the safest and best way of applying finish on your projects regardless whether you’re an expert or a novice and after this article not only will you get larger biceps you will become an expert in applying oil finish.
You can use this method in linseed oil or tung oil and you’d want to read up on my other articles on the different type of effects each oil gives to the timber. I’m personally a big fan of Kunos Livos which is 100% natural but this oil doesn’t work on all timbers and can if not applied correctly give disastrous results, always best to experiment on scrap before committing it on your projects.
Process:
Apply either raw or boiled linseed diluted with five parts of turpentine or citrus solvents, I like to use citrus solvents for its pleasant smell and it’s a natural safe product. You commonly use raw linseed for outdoor furniture and BLO for indoor. Dilution of the oil allows the oil to penetrate the wood better, it leaves a thinner film on the surface and is more economical. A quick word on the economics, there is no need to spend $50 on a bottle of BLO on popular name brands without mentioning them. You might think they put something inside making it a better product when the truth is unlike the old advert “oils and oils” in this case oil is oil. 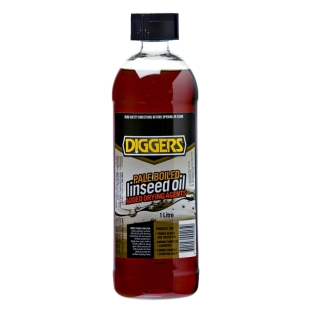 So if you buy BLO or Raw from your local hardware store like Diggers brand here in Australia which costs around $11 at Bunnings you can bet it’s the same oil they have in the cans at $50+ at your most popular and over priced woodworking stores. Well enough on that.
To begin start early in the morning as this is an all day event and keep checking on your progress every half hour or so.
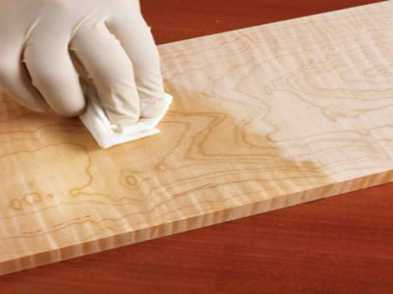 Apply thin coats not heavy ones advocated by retail sellers and allow some time for the oil to soak into the timber and recoat as needed until no more oil is being sucked into the timber and then comes the laborious part, rub, rub and rub day after day creating a friction you might say this is burnishing the timber. You keep doing this until no more oil is being regurgitated through the pores leaving you out of breath, sores muscles but a beautiful lustrous sheen for everyone to marvel at.
The process is simple but the work is hard just enjoy the process.

Generally this is the procedure that I use, less the thinner. You know I use Tried & True products wich contain no heavy metal driers or other toxic chemicals. I find that their “Danish Oil” is thin enough for good penetration. I’m not sure why they call it Danish Oil, it’s just polymerised (heated) linseed oil. My typical routine is to apply a thin coat of the “Danish oil” and over the coarse of an hour keep rubbing in more oil to any areas that look “dry”. Then buff the whole piec until no residue is visible on the rage. Then repeat for several days. The last coat or two will be the original finish from Tried & True. It is linseed oil with beeswax.
If I want the piece to have a higher luster I rub each coat with 0000 steel wool. If I want a low luster I just stick with the cotton cloth.
I like to add a maintenance coat after a year or two. The pieces generally don’t need it, but it makes me feel better. Plus it gives me a chance to inspect my work and see how it is holding up.
LikeLiked by 1 person
That is a good practice to maintain the sheen and as you’re maintaining your actually adding further protection. You’re methods are the same as mine, I also like to build up a slurry to fill in the pores on the final coats. Generally it does take 3-4weeks to be fully cured upon which I then buff it wax. Even though tried and true has wax in it you will notice a higher shine if you wax it afterwards but you can omit it.
LikeLiked by 1 person
Hi guys.
Some time ago I was back and forward e-mailing Greg about linseed oil and BLO – a very silly thing now but back then what the hell was BLO???. lol
So I ended settle with ‘vegetable cooking oils’ (olive oil as we produce it it’s very cheap, sun flower, linseed oil, etc) and pure bees wax and of course shellac always depending the looks and the use.
For great results I agree the best tool is: “Elbow Power”
LikeLike
Vegetable oil? that’s a new one, how did that work out for you
LikeLike
It worked very nice.
You see the BLO is my vegetable linseed oil. Instead of buy it in a hardware store I buy it on the super market and its great for toys. For spoons and cutting boards in the kitchen any vegetable cooking oil like olive oil, sunflower oil works great. For other projects I made some experiments with oil+wax and oil+shellac. So far so good!
LikeLiked by 1 person
Vegetable oil will not provide any protection on it’s own plus it will take probably two weeks to dry as it has no drying agents. Works much like raw linseed. It’s good to see you’ve experimented by applying shellac and wax to it. I’ve just learned something new from you my friend. That’s the purpose of this blog to learn from each other. However I don’t believe I will ever apply vegetable oil to my projects.
LikeLike
Yes I know about that.
But you see some toys after ready were just immediately chewed by my youngest. So my preference goes on those type of oils… 😀 And the same for kitchen wooden stuff.
After some learning experiences…. read some very wrong… I came up with this for other projects:
I rub a thin oil coat as my 1st coat followed by my own mixture of shellac, light sanding, + 3 or 4 coats, steel wool and then wax. 90% of my projects came out from pine wood!
Outdoor stuff, oil+ melted wax 2 coats, and then check every 6 moths. Remember that thing to hold the hose, almost one year with regular white PVA glue getting sun and rain all year.
LikeLiked by 1 person